الثلاثاء، 29 مارس 2011

THE FIVE MOST COMMON NETWORK PROBLEMS


1. Cable Problem: Cables that connect different parts of a network can be cut or shorted. A short can happen when the wire conductor comes in contact with another conductive surface, changing the path of the signal. Cable testers can be used to test for many types of cable problems such as:
Cut cable, incorrect cable connections, Cable shorts, Interference level, Connector Problem
2. Connectivity Problem: A connectivity problem with one or more devices in a network can occur after a change is made in configuration or by a malfunction of a connectivity component, such as hub, a router or a Switch.

3. Excessive Network Collisions: These often lead to slow connectivity. The problem can occur as a result of bad network setup/plan, a user transferring a lot of information or jabbering network card.
NB: A jabbering Network card is a network card that is stuck in a transmit mode. This will be evident because the transmit light will remain on constantly, indicating that the Network card is always transmitting.
4, Software Problem: Network problems can often be traced to software configuration such as DNS configuration, WINS configuration, the registry etc.
5. Duplicate IP Addressing: A common problem in many networking environments occurs when two machines try to use the same IP address. This can result in intermittent communications.

Network connectivity between SLAC and RL, UK

Rutherford lab (RL) computer center, near Oxford England, is planning to become a BaBar tier 1 remote computing site. This means it will have a copy of all the Babar data (currently 1 TByte a day and expected to increase by a factor of 3 in the next year), and will be a major site where Babar computing will be performed. As such it needs excellent connectivity/performance to SLAC and other BaBar collaborator sites. While making throughput measurements from SLAC (pharlap.slac.stanford.edu) to RL (dev04.hepgrid.clrc.ac.uk) in preparation for the SC2001 bandwidth challenge it was discovered that the maximum throughput achievable was about 40 Mbits/s. The pipechar from SLAC to RL indicates that the connection is via ESnet and JAnet and the bottleneck is somewhere in JAnet. The pipechar from RL to SLAC appears to show taht the route is OC48 all the way. The link from SLAC to ESnet at this time was OC3. This discrepancy (OC48 vs OC3 for the SLAC - ESnet link) is probably due to pipechar inaccuracies on more distant links.
Routes
The traceroute from SLAC to IN2P3 shows that there is about 70msec. round trip time (RTT) between SLAC and ESnet and 139msec. from SLAC to RL. It also clearly indicates the carriers as being ESnet and JAnet. The traceroute from RL to SLAC indicates the route is fairly symmetric.
Follow Up
I remeasured the pipechar from SLAC to RL but the ~40Mbits/s bottleneck still appeared in JAnet. We also made some more in depth measurements of the iperf TCP throughput as a function of window size and streams. These measurements were made with the iperf client on pharlap.slac.stanford.edu (a Sun E4500 with 6*336MHz cpus running Solaris 5.8 with a GE interface and a 4MByte TCP buffer) and dev04.hepgrid.clrc.ac.rl a 604 MHz Linux 2.2.16-3 host with a GE interface and an 8MByte TCP buffer. The results are shown below, and indicate that that the maxima (10% of the measurements that give the greatest throughput) are over 38Mbits/s. This is well below the expected maximum of about 100 Mbps on an OC3 bottleneck link.
SLAC-RL iperf tcp throughput
Resolution
On Jan 14 '02 I received the following email from Chris Selig at RAL:
Would it be possible for you to re-run your test between SLAC and RAL. We have identified (and fixed) a routing problem with the network to which the dev04 is connected. This problem affected ONLY the network on which the test machine lived, which explains why none of our measurements show up the problem. I reran the test, and got a maximum throughput of 37Mbits/s with the top 10% measurements being over 29Mbits/s. I also noticed that the maximum window size was set to 65KBytes and so requested that it be increased.
On Friday March 1st Tim Folkes of RL reported: OK, Have made the change, let me know if it improves things.
I then remeasured the throughputs using varying window sizes and streams. I was able to achieve over 100Mbits/s with various streams/window combinations.

Network Information System (NIS/YP)

29.4 Network Information System (NIS/YP)

Written by Bill Swingle. Enhanced by Eric Ogren and  john Erdelhoff.

29.4.1 What Is It?

NIS, which stands for Network Information Services, was developed by Sun Microsystems to centralize administration of UNIX® (originally SunOS™) systems. It has now essentially become an industry standard; all major UNIX like systems (Solaris™, HP-UX, AIX®, Linux, NetBSD, OpenBSD, FreeBSD, etc) support NIS.
NIS was formerly known as Yellow Pages, but because of trademark issues, Sun changed the name. The old term (and yp) is still often seen and used.
It is a RPC-based client/server system that allows a group of machines within an NIS domain to share a common set of configuration files. This permits a system administrator to set up NIS client systems with only minimal configuration data and add, remove or modify configuration data from a single location.
It is similar to the Windows NT® domain system; although the internal implementation of the two are not at all similar, the basic functionality can be compared.

29.4.2 Terms/Processes You Should Know

There are several terms and several important user processes that you will come across when attempting to implement NIS on FreeBSD, whether you are trying to create an NIS server or act as an NIS client:
Term Description
NIS domainname An NIS master server and all of its clients (including its slave servers) have a NIS domainname. Similar to an Windows NT domain name, the NIS domainname does not have anything to do with DNS.
rpcbind Must be running in order to enable RPC (Remote Procedure Call, a network protocol used by NIS). If rpcbind is not running, it will be impossible to run an NIS server, or to act as an NIS client.
ypbind “Binds” an NIS client to its NIS server. It will take the NIS domainname from the system, and using RPC, connect to the server. ypbind is the core of client-server communication in an NIS environment; if ypbind dies on a client machine, it will not be able to access the NIS server.
ypserv Should only be running on NIS servers; this is the NIS server process itself. If ypserv(8) dies, then the server will no longer be able to respond to NIS requests (hopefully, there is a slave server to take over for it). There are some implementations of NIS (but not the FreeBSD one), that do not try to reconnect to another server if the server it used before dies. Often, the only thing that helps in this case is to restart the server process (or even the whole server) or the ypbind process on the client.
rpc.yppasswdd Another process that should only be running on NIS master servers; this is a daemon that will allow NIS clients to change their NIS passwords. If this daemon is not running, users will have to login to the NIS master server and change their passwords there.

29.4.3 How Does It Work?

There are three types of hosts in an NIS environment: master servers, slave servers, and clients. Servers act as a central repository for host configuration information. Master servers hold the authoritative copy of this information, while slave servers mirror this information for redundancy. Clients rely on the servers to provide this information to them.
Information in many files can be shared in this manner. The master.passwd, group, and hosts files are commonly shared via NIS. Whenever a process on a client needs information that would normally be found in these files locally, it makes a query to the NIS server that it is bound to instead.

29.4.3.1 Machine Types

  • A NIS master server. This server, analogous to a Windows NT primary domain controller, maintains the files used by all of the NIS clients. The passwd, group, and other various files used by the NIS clients live on the master server.
    Note: It is possible for one machine to be an NIS master server for more than one NIS domain. However, this will not be covered in this introduction, which assumes a relatively small-scale NIS environment.
  • NIS slave servers. Similar to the Windows NT backup domain controllers, NIS slave servers maintain copies of the NIS master's data files. NIS slave servers provide the redundancy, which is needed in important environments. They also help to balance the load of the master server: NIS Clients always attach to the NIS server whose response they get first, and this includes slave-server-replies.
  • NIS clients. NIS clients, like most Windows NT workstations, authenticate against the NIS server (or the Windows NT domain controller in the Windows NT workstations case) to log on.

29.4.4 Using NIS/YP

This section will deal with setting up a sample NIS environment.

29.4.4.1 Planning

Let us assume that you are the administrator of a small university lab. This lab, which consists of 15 FreeBSD machines, currently has no centralized point of administration; each machine has its own /etc/passwd and /etc/master.passwd. These files are kept in sync with each other only through manual intervention; currently, when you add a user to the lab, you must run adduser on all 15 machines. Clearly, this has to change, so you have decided to convert the lab to use NIS, using two of the machines as servers.
Therefore, the configuration of the lab now looks something like:
Machine name IP address Machine role
ellington 10.0.0.2 NIS master
coltrane 10.0.0.3 NIS slave
basie 10.0.0.4 Faculty workstation
bird 10.0.0.5 Client machine
cli[1-11] 10.0.0.[6-17] Other client machines
If you are setting up a NIS scheme for the first time, it is a good idea to think through how you want to go about it. No matter what the size of your network, there are a few decisions that need to be made.

29.4.4.1.1 Choosing a NIS Domain Name

This might not be the “domainname” that you are used to. It is more accurately called the “NIS domainname”. When a client broadcasts its requests for info, it includes the name of the NIS domain that it is part of. This is how multiple servers on one network can tell which server should answer which request. Think of the NIS domainname as the name for a group of hosts that are related in some way.
Some organizations choose to use their Internet domainname for their NIS domainname. This is not recommended as it can cause confusion when trying to debug network problems. The NIS domainname should be unique within your network and it is helpful if it describes the group of machines it represents. For example, the Art department at Acme Inc. might be in the “acme-art” NIS domain. For this example, assume you have chosen the name test-domain.
However, some operating systems (notably SunOS) use their NIS domain name as their Internet domain name. If one or more machines on your network have this restriction, you must use the Internet domain name as your NIS domain name.

29.4.4.1.2 Physical Server Requirements

There are several things to keep in mind when choosing a machine to use as a NIS server. One of the unfortunate things about NIS is the level of dependency the clients have on the server. If a client cannot contact the server for its NIS domain, very often the machine becomes unusable. The lack of user and group information causes most systems to temporarily freeze up. With this in mind you should make sure to choose a machine that will not be prone to being rebooted regularly, or one that might be used for development. The NIS server should ideally be a stand alone machine whose sole purpose in life is to be an NIS server. If you have a network that is not very heavily used, it is acceptable to put the NIS server on a machine running other services, just keep in mind that if the NIS server becomes unavailable, it will affect all of your NIS clients adversely.

29.4.4.2 NIS Servers

The canonical copies of all NIS information are stored on a single machine called the NIS master server. The databases used to store the information are called NIS maps. In FreeBSD, these maps are stored in /var/yp/[domainname] where [domainname] is the name of the NIS domain being served. A single NIS server can support several domains at once, therefore it is possible to have several such directories, one for each supported domain. Each domain will have its own independent set of maps.
NIS master and slave servers handle all NIS requests with the ypserv daemon. ypserv is responsible for receiving incoming requests from NIS clients, translating the requested domain and map name to a path to the corresponding database file and transmitting data from the database back to the client.

29.4.4.2.1 Setting Up a NIS Master Server

Setting up a master NIS server can be relatively straight forward, depending on your needs. FreeBSD comes with support for NIS out-of-the-box. All you need is to add the following lines to /etc/rc.conf, and FreeBSD will do the rest for you.
  1. nisdomainname="test-domain"
    This line will set the NIS domainname to test-domain upon network setup (e.g. after reboot).
  2. nis_server_enable="YES"
    This will tell FreeBSD to start up the NIS server processes when the networking is next brought up.
  3. nis_yppasswdd_enable="YES"
    This will enable the rpc.yppasswdd daemon which, as mentioned above, will allow users to change their NIS password from a client machine.
Note: Depending on your NIS setup, you may need to add further entries. See the section about NIS servers that are also NIS clients, below, for details.
After setting up the above entries, run the command /etc/netstart as superuser. It will set up everything for you, using the values you defined in /etc/rc.conf. As a last step, before initializing the NIS maps, start the ypserv daemon manually:
# /etc/rc.d/ypserv start

29.4.4.2.2 Initializing the NIS Maps

The NIS maps are database files, that are kept in the /var/yp directory. They are generated from configuration files in the /etc directory of the NIS master, with one exception: the /etc/master.passwd file. This is for a good reason, you do not want to propagate passwords to your root and other administrative accounts to all the servers in the NIS domain. Therefore, before we initialize the NIS maps, you should:
# cp /etc/master.passwd /var/yp/master.passwd
# cd /var/yp
# vi master.passwd
You should remove all entries regarding system accounts (bin, tty, kmem, games, etc), as well as any accounts that you do not want to be propagated to the NIS clients (for example root and any other UID 0 (superuser) accounts).
Note: Make sure the /var/yp/master.passwd is neither group nor world readable (mode 600)! Use the chmod command, if appropriate.
When you have finished, it is time to initialize the NIS maps! FreeBSD includes a script named ypinit to do this for you (see its manual page for more information). Note that this script is available on most UNIX Operating Systems, but not on all. On Digital UNIX/Compaq Tru64 UNIX it is called ypsetup. Because we are generating maps for an NIS master, we are going to pass the -m option to ypinit. To generate the NIS maps, assuming you already performed the steps above, run:
ellington# ypinit -m test-domain
Server Type: MASTER Domain: test-domain
Creating an YP server will require that you answer a few questions.
Questions will all be asked at the beginning of the procedure.
Do you want this procedure to quit on non-fatal errors? [y/n: n] n
Ok, please remember to go back and redo manually whatever fails.
If you don't, something might not work.
At this point, we have to construct a list of this domains YP servers.
rod.darktech.org is already known as master server.
Please continue to add any slave servers, one per line. When you are
done with the list, type a <control D>.
master server   :  ellington
next host to add:  coltrane
next host to add:  ^D
The current list of NIS servers looks like this:
ellington
coltrane
Is this correct?  [y/n: y] y

[..output from map generation..]

NIS Map update completed.
ellington has been setup as an YP master server without any errors.
ypinit should have created /var/yp/Makefile from /var/yp/Makefile.dist. When created, this file assumes that you are operating in a single server NIS environment with only FreeBSD machines. Since test-domain has a slave server as well, you must edit /var/yp/Makefile:
ellington# vi /var/yp/Makefile
You should comment out the line that says
NOPUSH = "True"
(if it is not commented out already).

29.4.4.2.3 Setting up a NIS Slave Server

Setting up an NIS slave server is even more simple than setting up the master. Log on to the slave server and edit the file /etc/rc.conf as you did before. The only difference is that we now must use the -s option when running ypinit. The -s option requires the name of the NIS master be passed to it as well, so our command line looks like:
coltrane# ypinit -s ellington test-domain

Server Type: SLAVE Domain: test-domain Master: ellington

Creating an YP server will require that you answer a few questions.
Questions will all be asked at the beginning of the procedure.

Do you want this procedure to quit on non-fatal errors? [y/n: n]  n

Ok, please remember to go back and redo manually whatever fails.
If you don't, something might not work.
There will be no further questions. The remainder of the procedure
should take a few minutes, to copy the databases from ellington.
Transferring netgroup...
ypxfr: Exiting: Map successfully transferred
Transferring netgroup.byuser...
ypxfr: Exiting: Map successfully transferred
Transferring netgroup.byhost...
ypxfr: Exiting: Map successfully transferred
Transferring master.passwd.byuid...
ypxfr: Exiting: Map successfully transferred
Transferring passwd.byuid...
ypxfr: Exiting: Map successfully transferred
Transferring passwd.byname...
ypxfr: Exiting: Map successfully transferred
Transferring group.bygid...
ypxfr: Exiting: Map successfully transferred
Transferring group.byname...
ypxfr: Exiting: Map successfully transferred
Transferring services.byname...
ypxfr: Exiting: Map successfully transferred
Transferring rpc.bynumber...
ypxfr: Exiting: Map successfully transferred
Transferring rpc.byname...
ypxfr: Exiting: Map successfully transferred
Transferring protocols.byname...
ypxfr: Exiting: Map successfully transferred
Transferring master.passwd.byname...
ypxfr: Exiting: Map successfully transferred
Transferring networks.byname...
ypxfr: Exiting: Map successfully transferred
Transferring networks.byaddr...
ypxfr: Exiting: Map successfully transferred
Transferring netid.byname...
ypxfr: Exiting: Map successfully transferred
Transferring hosts.byaddr...
ypxfr: Exiting: Map successfully transferred
Transferring protocols.bynumber...
ypxfr: Exiting: Map successfully transferred
Transferring ypservers...
ypxfr: Exiting: Map successfully transferred
Transferring hosts.byname...
ypxfr: Exiting: Map successfully transferred

coltrane has been setup as an YP slave server without any errors.
Don't forget to update map ypservers on ellington.
You should now have a directory called /var/yp/test-domain. Copies of the NIS master server's maps should be in this directory. You will need to make sure that these stay updated. The following /etc/crontab entries on your slave servers should do the job:
20      *       *       *       *       root   /usr/libexec/ypxfr passwd.byname
21      *       *       *       *       root   /usr/libexec/ypxfr passwd.byuid
These two lines force the slave to sync its maps with the maps on the master server. These entries are not mandatory because the master server automatically attempts to push any map changes to its slaves. However, due to the importance of correct password information on other clients depending on the slave server, it is recommended to specifically force the password map updates frequently. This is especially important on busy networks where map updates might not always complete.
Now, run the command /etc/netstart on the slave server as well, which again starts the NIS server.

29.4.4.3 NIS Clients

An NIS client establishes what is called a binding to a particular NIS server using the ypbindypbind checks the system's default domain (as set by the domainname command), and begins broadcasting RPC requests on the local network. These requests specify the name of the domain for which ypbind is attempting to establish a binding. If a server that has been configured to serve the requested domain receives one of the broadcasts, it will respond to ypbind, which will record the server's address. If there are several servers available (a master and several slaves, for example), ypbind will use the address of the first one to respond. From that point on, the client system will direct all of its NIS requests to that server. ypbind will occasionally “ping” the server to make sure it is still up and running. If it fails to receive a reply to one of its pings within a reasonable amount of time, ypbind will mark the domain as unbound and begin broadcasting again in the hopes of locating another server. daemon.

29.4.4.3.1 Setting Up a NIS Client

Setting up a FreeBSD machine to be a NIS client is fairly straightforward.
  1. Edit the file /etc/rc.conf and add the following lines in order to set the NIS domainname and start ypbind upon network startup:
    nisdomainname="test-domain"
    nis_client_enable="YES"
  2. To import all possible password entries from the NIS server, remove all user accounts from your /etc/master.passwd file and use vipw to add the following line to the end of the file:
    +:::::::::
    Note: This line will afford anyone with a valid account in the NIS server's password maps an account. There are many ways to configure your NIS client by changing this line. See the netgroups section below for more information. For more detailed reading see O'Reilly's book on Managing NFS and NIS.
    Note: You should keep at least one local account (i.e. not imported via NIS) in your /etc/master.passwd and this account should also be a member of the group wheel. If there is something wrong with NIS, this account can be used to log in remotely, become root, and fix things.
  3. To import all possible group entries from the NIS server, add this line to your /etc/group file:
    +:*::
To start the NIS client immediately, execute the following commands as the superuser:
# /etc/netstart
# /etc/rc.d/ypbind start
After completing these steps, you should be able to run ypcat passwd and see the NIS server's passwd map.

الاثنين، 28 مارس 2011

Home Network Setup - Setting up a Local Area Network

With computers getting cheaper and cheaper these days, it is not uncommon for a household to have more than one PC. If that describes you, then you have probably found yourself in the situation where you wished you could access the other PC to retrieve a file, use the printer attached to the other PC, play multi-player computer games, or most importantly share your broadband Internet access such as cable or DSL modem with the other PC.
To accomplish this all you need is a home network where you connect two or more PCs. There are several ways of doing this with the main difference being cost, security, and reliability. Let's first look at the different scenarios.
Your current setup
Most likely, your current configuration looks like this:
Your cable/DSL modem plugs straight into the computer. The computer is exposed to the public Internet (indicated by the color red). There is no connection for more than one computer. You only have one IP address from your ISP.
Option #1: Multiple IP addresses
An easy way of getting the second PC online is to install a network card in it, buy a hub, plug both PCs and the cable/DSL modem into the hub, call your ISP and get a second IP address and configure the second PC accordingly.
It is what your ISP most likely will try to talk you into doing.
Advantages:
  • the two PCs are independent from each other
  • relatively easy setup
Disadvantages:
  • Both PCs are exposed to public Internet
  • Enabling file sharing adds security risk
  • Higher monthly ISP cost for additional IP addresses
Option #2: Internet Connection Sharing via Software
In this scenario, you install a second network card in the computer that is connected to the Internet, install a network card in the second PC, connect them via a CAT5 cable. You configure the connection between PC 1 and PC 2 as a private network, then install and configure Internet Connection Sharing software (ICS) on PC 1, lastly configure PC 2 to access the Internet via PC 1.
Probably the cheapest solutions of them all, but also the least reliable one.
Advantages:
  • cheap, only requires 2 network cards and Cat5 cable
  • ICS software is available for free with newer versions of Windows or online as freeware
  • No additional ISP cost
Disadvantages:
  • One PC is exposed to public Internet
  • Can be difficult to configure
  • If PC 1 is shut down or broken, PC 2 cannot get online
  • Can be unreliable
  • Limited number of PCs
Option #3: Using a hardware router/gateway/firewall device
In this scenario, you install a hardware router/gateway/firewall device, connect the public side to your cable/DSL modem, connect the private side to a hub, connect all PCs to the hub, configure all PCs for your private network.
While the costliest solution, by far the safest, most reliable, and most scalable one. Highly recommended.
Advantages:
  • All PCs are protected by firewall (indicated by the color green)
  • File sharing between PCs is safe
  • No additional ISP cost
  • Connect many PCs to home network without additional cost
  • Easy PC configuration due to DHCP server in gateway device
  • Optional additional functionality with gateway-integrated wireless access point, print server, DMZ, content filtering, and more
Disadvantages:
  • Can cost several hundred dollars depending on gateway device and features
  • Somewhat of a learning curve
As you have probably figured out by now, option #3 is the most desirable solution because it gives you a protected private network, it is a very stable solution, it is easily and extremely expandable, and it gives you the most features.
Note: This article assumes that your cable/DSL modem uses an Ethernet connection, NOT a USB connection because it will eliminate options #1 and #3. If your ISP gives you a choice, insist on getting the modem with an Ethernet connection

Wireless Network Security


Wireless networking has experienced a huge increase in popularity over the last couple of years. The necessary hardware is widely available to consumers, it is very affordable, and relatively easy to install and configure. Gateway devices, common called "routers" or "firewalls" by consumers, that allow users to share a broadband connection with and protect multiple computers on a home network have been around for a while. The addition of wireless capabilities to these gateway devices gives the user the convenience of taking a computer anywhere in the house, and not have to worry about running wires through walls and crawl spaces and attics to connect computers in various parts of the house. Industrial-strength high-performance versions have been around even longer in company environments, allowing employees to roam between offices, cubes, and conference rooms with laptops without ever losing connectivity.
It is a great technology that offers many benefits. As the saying goes, however, with privilege comes responsibility. A responsibility that is unfortunately much too often ignored by the person implementing it. A wireless network needs to be properly secured as it poses a number of extremely serious risks and dangers if left wide open and exposed, which many users are unaware of.
Why secure a wireless network?
If you are thinking right now that you have nothing important on your network and that you have no need to secure your wireless network, I guarantee you that you will reconsider your opinion after reading the next few paragraphs. Consider the following dangers of having an unsecured wireless network.
Bandwidth Parasite
In a "best" case scenario, all the intruder does is use the victim's broadband connection to get online without paying. Maybe just to surf the web, maybe to download pirated music or software. This does not cause any direct harm to the compromised network, but it can slow down Internet or network access for the victim, the legitimate user of the network, if an intruder leeches off his bandwidth. This could mean substantial additional ISP cost for the victim if the ISP meters used bandwidth and charges for actual usage.
Masking criminal activity
An unauthorized user could abuse the victim's connection for malicious purposes like hacking, launching a DoS attack, or distributing illegal material. Since the intruder is a part of the private network and sits behind its gateway device, any traffic between him and the Internet will appear to be coming from the public IP address the ISP assigned to the victim. The ISP has no idea how many computers are behind the gateway, who they belong to, and what they are used for. If the criminal activity is discovered and investigated, the origin of the attack will be traced back to the victim's broadband account. It is a pretty safe bet that nobody wants to be accused of and go to jail for distributing child pornography or hacking into restricted company or government networks (just to mention a few examples) if the crime was in reality committed by a cracker from behind an innocent victim's network. Reviewing ISP's Terms of Service usually reveals a clause that not only allows the ISP to reveal customer information to the authorities to assist with legitimate criminal investigations, but also holds the customer responsible for any activities the connection is (ab)used for.
Free access to private data
A wireless network is also a direct backdoor into the victim's private network - literally. Instead of intruding from the public side of the gateway device, the intruder connects directly to the network on the private side of the gateway device, completely bypassing any hardware firewall between the private network and the broadband modem. Most people assume that since they are behind a gateway device with a built-in firewall their private network is safe, hence letting down their guard, sharing drives, and being generally careless. The intruder can completely take advantage of this by snooping around undisturbed and getting access to confidential data. This could be in form of personal information such as financial data, tax records, wills, and more that can be abused for identity theft for example, or in form of work-related information such as confidential specs, development information, trade secrets, and more that the victim has brought home from the office. By employing a sniffer an intruder can even sniff email or FTP user names and passwords because they are usually transmitted in cleartext, and use that information to gain unauthorized access to email accounts or web servers without the victim's knowledge.
Backdoor into corporate networks
In addition, a wireless network could also be an indirect backdoor into a corporate network. An intruder can specifically target an employee of a company whose confidential information is valuable to him for monetary or competitive reasons. If that employee establishes a VPN connection either permanently from his gateway or from a machine behind his gateway to the company network, the intruder can then piggyback on the VPN tunnel and gain unauthorized access to company resources, a serious security breach and every network administrator's nightmare.
That's why
By now the danger should be pretty clear: Unsecured wireless networks are unacceptable due to the extremely high risks involved. Yet there are countless unsecured wireless networks out there. A train ride through the Silicon Valley East Bay area revealed about 60 wireless networks, 40 of them wide open and insecure. A drive around a residential neighborhood covering just a few blocks revealed over 30 wireless networks, 20 of them wide open and insecure.
What is even scarier is that it does not take any skill to discover and gain unauthorized access to wireless networks. One does not have to be a programmer, Linux expert, or network specialist. All it takes is a laptop with a wireless network card, and some software (also available for Windows) that can be easily downloaded for free from the Internet. Armed with these basic tools anybody can drive around, detect open wireless networks, and connect to them. With a Linux machine, additional software, some advanced knowledge, and some time and patience it is even possible to break into wireless networks that use encryption

Change DNS Settings in Windows XP

Sometimes you may want to override the default DNS (Domain Name Server) settings on your computer so you can specify which DNS server is used, or which IP address should be used for a particular domain. There are two ways to do this: Specify the DNS and map IP addresses.

(1) Specify the DNS to be Used

This method tells your computer which DNS to use for all your internet browsing. Most home users have this set to "automatic" and the DNS is provided by the user's ISP, but you can use any DNS you like (you can even make your own DNS if you're keen).
Before you start you will need to know the IP address of the DNS to use - if you don't know this you'll need to ask your system administrator or ISP.
To set your DNS, you need to find the Internet Protocol window.

For Users on a Dial-up Connection:
Go to My Computer>Dialup Networking.
Right-click your internet connection and select Properties.
A window will open - click the Server Types tab. Click TCP/IP Settings.
For All Other Users:
Go to Control Panel>Network Connections and select your local network.
Click Properties, then select Internet Protocol (TCP/IP).
Click Properties.
You will see a window like the one below - this is the Internet Protocol window. Select "Use the following DNS server addresses" and enter the desired DNS server(s) in the space(s) provided.
Internet Protocol Window 
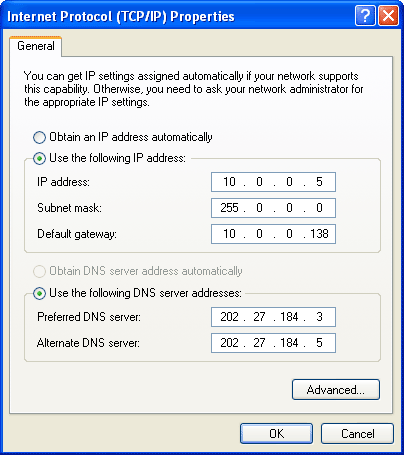
Note: To add more DNS servers, click Advanced then the DNS tab.

(2) Map IP Addresses

This method allows you to create settings for individual domains without altering your main DNS preferences. This is useful if you don't have access to a DNS or if you want to specify the location of a single domain without interfering with any of your other online activities.
Open the following file in a plain text editor such as Notepad:
C:\WINDOWS\system32\drivers\etc\hosts
The file looks like the one below. At the end of the file (in this case, under the localhost entry), enter the IP and domain you wish to specify. When your browser attempts to access a domain it refers to this file first - if the domain is found here then the specified IP address will be used. If the domain is not found here, then the normal DNS server (as specified above) will be used.
Hosts File

Networking 101: Concepts and Definitions


Individual computers provide opportunities for tremendous productivity gains, but they become many times more powerful when they're connected to one another in data networks that give them the ability to share data and processing resources. With a network, five colleagues can read and edit an evolving document from their own computer with minimal effort and coordination. Without a network, these colleagues have to share time on the same computer or work out a process for exchanging removable storage media (for example, floppy diskette or USB drive). In a similar fashion, networks let us all realize economies of scale by running resource-hungry applications on high-power hardware
In this article we'll discuss some of the basic concepts and definitions underlying modern networks. In this article's companion piece: Networking 101: Evaluating Your Needs and Options, we'll define and describe the basic hardware components that organizations need to acquire and install in order to build a network. That article also contains a list of further resources that you can consult for a more detailed, comprehensive explanation of networking concepts and technologies.
What Is a Computer Network?
In the broadest sense, a network is any interconnected group of people or things capable of sharing meaningful information with one another. In a technology context, network is usually short for "computer network" or "data network" and implies that computers are the things sharing the meaningful information. At a conceptual level, all data networks consist of nodes, which refers to any computer or digital device using the network and links, the physical connections (either wired or wireless) that carry messages between nodes.
Data networks are important to all contemporary organizations because they provide faster, easier access to any message or data that can be represented and stored in digital format. For example, when your colleagues and predecessors research an issue relevant to your organization and share their data and conclusions with you in a data format your computer recognizes, you can copy key information from their report into your own, saving yourself significant amounts of time (of course, you're always sure to give credit where it's due). If the colleague whose work you're relying on works in the same cubicle as you and they remember where they've stored the relevant report, a network may not offer significant advantages since you can turn to him or he and ask for the file on a CD or USB flash drive. However, in many organizations, large distances separate co-workers, and data sharing becomes a significant logistical problem in the absence of a network.
In addition to data sharing, computer networks also enable resource sharing, an important consideration in all budget-conscious organizations. Rather than buying one printer for every employee and replacing them when they wear out, an organization with a network can buy a single printer, connect it to the network, and configure it in such a way that every computer user in the organization can print to it. The initial cost of a networked printer is usually more than the cost of a single desktop printer, but when considering costs on a per-user basis, the average cost of the networked printer is often much less than the cost of buying a printer for every employee. While some networked devices such as printers, scanners, and fax machines have predetermined, specialized functions, you can also network and share generic, unspecialized computing power in the form of servers. Servers are large, powerful computers that can handle resource-intensive tasks more efficiently than desktop computers. As with the networked printer, the initial outlay for a server is more than that for a desktop computer, but across the organization, it's often cheaper to run the server-based version of a program since individual users won't need expensive, high-performance desktop and laptop computers. Servers can also deploy software to other networked machines at a lower cost. For more information on this topic, read A Field Guide to Servers and Networks 101: An Introduction to Server Applications.
Roles and Responsibilities
Networks also vary considerably in terms of the roles and responsibilities of the computers on that network and the relationships that tie those machines together. A computer totally disconnected from other devices is typically referred to as a standalone machine.
When several computers are interconnected, but no computer occupies a privileged position, the network is usually referred to as a peer-to-peer network. In this type of network, every computer can communicate with all the other machines on the network, but in general each one stores its own files and runs its own applications.
Peer to Peer Network
With a client-server network, one or more servers will perform critical functions on behalf of the other machines (the clients) on the network. These functions might include user authentication, data storage, and the running of large, shared, resource-intensive applications such as databases and client relationship management (CRM) software. Typically, both peer-to-peer and client-server networks rely on a shared Internet connection for access to external resources of these basic network structures.
Client Server Network
Another type of network that's been rapidly gaining in popularity over the past decade is the cloud-based network. In this model, an organization pays a third-party vendor to host data, applications and other resources on servers and manages those resources via a web browser. A cloud-dependent network can be simpler, cheaper, and greener than a client-server network since you aren't buying, maintaining and powering your own servers. However, it’s not necessarily the right solution for every organization – particularly those that handle and store sensitive client data or health records. Learn more about cloud computing for your nonprofit or library on TechSoup's cloud page.
Cloud Network
Standards and Protocols
Protocols, also known as standards, are essential parts of many modern technologies. In essence, they're consensus-based documents that describe guidelines for vendors, manufacturers, and other stakeholders in order to ensure quality and interoperability in a diverse, competitive marketplace. Most networking protocols are fairly obscure and you only need to worry about them if something goes wrong. However a few standards are so widely adopted that every decision-maker and accidental techie needs to know their names and basic functions. Discussing networking without implicit or explicit reference to Ethernet and TCP/IP protocols is like discussing American law and politics without reference to the Constitution and the Bill of Rights.
Furthermore, adopting widely-accepted protocols (also known as de facto standards) has benefits in all aspects of technology, since it's a form of future-proofing. When you need to repair, replace, or upgrade networking equipment years from now, you can safely predict that products and services compatible with today's widely-adopted standards will still be available. Therefore, you can replace a few pieces of outdated equipment without building a new network from scratch. Also, you'll be able to find technicians and consultants who still understand these protocols.
After several decades of struggle amongst competing network protocols (each with a different corporate sponsor), three sets of network protocols emerged as de facto standards for local networks by the late 1990s. In local area networks, Ethernet over twisted pair (also known as 10 BASE T, twisted-pair Ethernet, or IEEE 802.3) is the accepted standard for wired networking while 802.11b/g/n (or WiFi) is the accepted standard for wireless networks. The TCP/IP protocol stack is a standard component of almost all modern networks, especially when those networks expect to communicate on the Internet where TCP/IP is the lingua franca. In wide area networking, there still exists a large degree of diversity and competition among networking protocols. However, at the local network level, any networking technology your organization adopts should be compatible with the three standards mentioned above.
Conclusion
Networking offers a variety of advantages for many nonprofits and libraries over standalone machines, but they’re not necessarily needed for every office or work scenario. Continue reading the other parts of our Networks 101 series to better assess your needs and see what options are out there to fit them

special Computer Networks

Networks are collections of computers, software, and hardware that are all connected to help their users work together. A network connects computers by means of cabling systems, specialized software, and devices that manage data traffic. A network enables users to share files and resources, such as printers, as well as send messages electronically (e-mail) to each other.
Computer networks fall into two main types: client/server networks and peer-to-peer networks. A client/server network uses one or more dedicated machines (the server) to share the files, printers, and applications. A peer-to-peer network allows any user to share files with any other user and doesn’t require a central, dedicated server.
The most common networks are Local Area Networks or LANs for short. A LAN connects computers within a single geographical location, such as one office building, office suite, or home. By contrast, Wide Area Networks (WANs) span different cities or even countries, using phone lines or satellite links.
Networks are often categorized in other ways, too. You can refer to a network by what sort of circuit boards the computers use to link to each other – Ethernet and Token-Ring are the most popular choices. You can also refer to a network by how it packages data for transmission across the cable, with terms such as TCP/IP (Transmission Control Protocol/Internet Protocol) and IPX/SPX (Internet Package eXchnage/Sequenced Package eXchange).

Steps to Setting-Up a Network.
All networks go through roughly the same steps in terms of design, rollout, configuration, and management.
Designing Your Network
Plan on the design phase to take anywhere from one to three working days, depending on how much help you have ad how big your network is.
Here are the key tasks:
  • Settle on a peer-to-peer network or a client/server network.
  • Pick you network system software.
  • Pick a network language.
  • Figure out what hardware you need.
  • Decide on what degree of information security you need.
  • Choose software and hardware solutions to handle day-to-day management chores.
Rolling Out Your Network
Rolling out your network requires the following steps:
  • Run and test network cables.
  • Install the server or servers if you’re setting up a client/server network. (If you are setting up a peer-to-peer network, you typically don’t have to worry about any dedicated servers.)
  • Set up the workstation hardware.
  • Plug in and cable the Network Interface Cards (NICs – these connect the network to the LAN).
  • Install the hub or hubs (if you are using twisted-pair cable).
  • Install printers.
  • Load up the server software (the NOS, or Network Operating System) if your network is a client/server type.
  • Install the workstation software.
  • Install modem hardware for remote dail-up (if you want the users to be able to dial into the network).
  • Install the programs you want to run (application software).
  •  
Configuring Your Network
Network configuration means customizing the network for your own use.
  • Creating network accounts for your users (names, passwords, and groups).
  • Creating areas on shared disk drives for users to share data files.
  • Creating areas on shared disk drives for users to share programs (unless everyone runs programs from their own computer).
  • Setting up print queues (the software that lets users share networked printers).
  • Installing network support on user workstations, so they can "talk" to your network.

Managing Your Network
The work you do right after your LAN is up and running and configured can save you huge amounts of time in the coming months.
  • Mapping your network for easier management and troubleshooting.
  • Setting up appropriate security measures to protect against accidential and intentional harm.
  • Tuning up your LAN so that you get the best possible speed from it.
  • Creating company standards for adding hardware and software, so you don’t have nagging compatibility problems later.
  • Putting backup systems in place so that you have copies of data and programs if your hardware fails.
  • Installing some monitoring and diagnostic software so that you can check on your network’s health and get an early warning of implending problems.
  • Figuring out how you plan to handle troubleshooting – educating your LAN administrator, setting up a support contract with a software vendor, and so on.
Smooth Setup
One key advantage of a peer-to-peer network is that it’s easy to setup. With the simplest sort of peer-to-peer network, you just use the built-in networking that comes with your operating system (Windows 98, Windows 95, MacOS, and so on) and you have very little software to set up – even less if you have computers that have the operating system preinstalled, as most computers do these days.
For Windows 95 and Windows 98, the basic steps to setting up a peer-to-peer network are as follows:
  1. Sketch out your workgroup map.
  2. Figure out a naming convention (set rules for naming individual computers).
  3. Go to the first computer on your network and click Start – Settings – Control Panel.
  4. Double-click the Network icon to display the Network dialog box.
  5. Click the Configuration tab (if it isn’t already in the foreground).
  6. Click the File and Print Sharing button.
  7. Click both checkboxes so that they appear checked, and then click OK.
  8. Click the Identification tab.
  9. Make the computer a member of the workgroup by typing the workgroup name in the Workgroup: text box.
  10. Give the computer a unique name in the Computer name: text box.
  11. Repeat Steps 3-10 for each workstation in your new workgroup.
  12. Teach all the network users how to share files, directories, and printers.
Another key advantage of peer-to-peer networking is that you don’t have to buy a computer that nobody can use as a client workstation (something that client/server networking requires). Peer-to-peer networking offers other cost advantages:
  • The software is usually free. It either comes bundled with the workstation operating system or it is an inexpensive addition.
  • The software is simple. You don’t have to spend the money and time required training someone to learn a complex, full-featured Network Operating System.
  • Administartion is easy. Each user is a small-scale network administrator, responsible for whatever that user’s computer shares on the network

New Networking Devices

Computer network devices also known as communication devices and they constitute a data communication network.  These devices are routers, switches, hubs, LAN cards, gateway, modems, hardware firewall, CSU/DSU, ISDN terminals and transceivers.  In an Ethernet or WAN network, the data communication cannot be performed without these devices.  Being an IT professional or a network administrator, you must have the good understanding of these devices. 
Based on your business requirements, you have the select the best devices for your network and before selection, make sure that they are compatible with each other.  It is recommended that you select all the devices for your IT infrastructure from the same vendor.
The top vendors are Cisco, D-Link, LinkSys, Baynet, RealTek, 3Com, NetGear, Intel, Nortel, and Lucent etc.  A well designed IT infrastructure with the proper placement of the routers, servers, gateway and switches can reduce the operational cost and enhances the overall performance dramatically.
Routers
A router is a communication device that is used to connect two logically and physically different networks, two LANs, two WANs and a LAN with WAN.  The main function of the router is to sorting and the distribution of the data packets to their destinations based on their IP addresses. Routers provides the connectivity between the enterprise businesses, ISPs and in the internet infrastructure, router is a main device.  Cisco routers are widely used in the world.  Every router has routing software, which is known as IOS.  Router operates at the network layer of the OSI model.  Router does not broadcast the data packets.
Switches
Like the router, a switch is an intelligent device that maps the IP address with the MAC address of the LAN card.  Unlike the hubs, a switch does not broadcast the data to all the computers, it sends the data packets only to the destined computer.  Switches are used in the LAN, MAN and WAN.  In an Ethernet network, computers are directly connected with the switch via twisted pair cables.  In a network, switches use the three methods to transmit the data i.e. store and forward, cut through and fragment free.
Hubs
The central connecting device in a computer network is known as a hub.  There are two types of a hub i.e. active hub and passive hub.  Every computer is directly connected with the hub.  When data packets arrives at hub, it broadcast them to all the LAN cards in a network and the destined recipient picks them and all other computers discard the data packets.  Hub has five, eight, sixteen and more ports and one port is known as uplink port, which is used to connect with the next hub.
Modems
A modem is a communication device that is used to provide the connectivity with the internet.  Modem works in two ways i.e. modulation and demodulation. It coverts the digital data into the analog and analog to digital
LAN Cards
LAN cards or network adapters are the building blocks of a computer network. No computer can communicate without a properly installed and configured LAN card. Every LAN card is provided with a unique IP address, subnet mask, gateway and DNS (if applicable).  An UTP/STP cable connects a computer with the hub or switch.  Both ends of the cable have the RJ-45 connectors one is inserted into the LAN card and one in the hub/switch.  LAN cards are inserted into the expansion slots inside the computer.  Different LAN cards support different speed from 10/100 to 10/1000.
Multiplexer
Multiplexer is a device that is used to combining the several electrical signals into one signal

Choosing the Best Computer Network


Choosing the Best Computer Network

 business is growing. Is it time for a computer network? You've added 2 new staff members in the past year, and all 5 employees are complaining about the increasing difficulty of sharing files. Your billing database is on a computer which can only be accessed by your administrative assistant and you are concerned about not having a centralized backup of the files being saved on each employee's computer. If all this sounds familiar, it may be time to implement a computer network

Network Basics

Networks begin when two or more computers are connected so that information can be shared. In order to connect to any kind of network, a computer requires a network card and CAT5 or CAT6 cables. (If the computer has a "wireless" network card, radio signals can be used in place of the cables.) A network also requires a piece of equipment called a switch, which acts as a central routing "hub" for the information being shared. A switch is kind of like a mail room in a large company. It makes sure the addressed messages get to the right recipient.
You may have heard the term LAN or WAN. LAN stands for Local Area Network, and usually denotes a network of computers which are fairly close together, say in the same building or office. WAN stands for Wide Area Network. WANs usually connect local area networks which are separated by great distances. (For example, a larger company may have an office LAN in Seattle, and an office LAN in Boston. These two LANs could be connected via a WAN data line.)

Peer to Peer Networks

The most basic type of network is a called a peer to peer network. This type of network consists of several computers which are connected to each other. The "network" consists of shared folders located on computers within the network.
These folders are set to a "shared" status, so that other people connected to the network can access them. Each shared folder is accessed by the users of the network, who set up a certain drive letter (say H:) as a "pointer" to the shared folders on other computers. In addition, any printers connected to any computer can be shared to other network users.
Peer to Peer Network
Here's an example. Susan and Joe work together in a small office and need to look at files on each other's computers. Susan creates a folder called "SusansFiles" on her computer and sets it up as a shared folder. Joe can then use the network connections to "see" the folder called "SusansFiles".
He sets up a permanent shortcut called "H:" drive to the folder called "SusansFiles". Now when he turns his computer on, Windows Explorer will show the folders on his computer's C: drive, the CDROM D: drive and the shared H: drive as his available file locations. Susan can do the same with a folder that Joe shares out from his computer.
Benefits of a Peer to Peer Network:
  • A peer to peer network is inexpensive to set up. It uses the built in networking capabilities of Windows XP Professional (or Vista Business), so no special software is needed. It allows for file and printer sharing, and can be an adequate choice for a very small office.
Limits of a Peer to Peer Network
  • Peer to peer networks are dependent upon the computer knowledge of each employee, as certain rules must be followed in order to minimize network interruptions. If a user shuts down his machine in the middle of the day, other users on the network lose access to the files in that machine's shared folder. In the picture provided above, the laptop might only connect to the network when an employee is not traveling. Any files stored on that laptop are not available (and may not be backed up) when that employee is out of the office.
  • Network and data security are weak.
  • Files are not centralized, so getting a back up of all critical files is more difficult.
  • Ongoing tasks like anti-virus scanning and Windows updates are localized on each machine. Updating virus definitions and patches has to be done manually at each machine, which is time consuming.
.

Client Server Networks

A more common type of network is called a client server network. This type of network uses a central server and specialized network software. The server is dedicated and is only used to store files and run server tasks. The computers which connect to the server are called clients and these are the machines the company staff would use.
The server acts as the "hub" of the network, and does most of the "behind the scenes" maintenance and storage. Common server network operating systems include Windows Small Business Server 2003 or 2008, Windows Server or Linux.
Benefits of a Client Server Network
  • The server stores all of the shared files for each user.
  • The server runs the file backups which can be scheduled in the middle of the night, minimizing network interruptions.
  • The server manages user security, and insures that all users who access the network are authorized to do so.
  • The server manages printer sharing and acts as a central repository for the printer drivers and settings.
  • The server manages other common tasks such as internet access, email routing, Windows updating and anti-virus definition management.
  • The server can also share software applications out to multiple users.
  • The server can also provide for an "Intranet", an internal website which holds shared company information such as news announcements, HR policies, training documents, and more. In short, a client server network provides for easier network administration, and provides a much more robust environment in which provide secure and manageable access to company data.
Client Server Network
Limitations of a Client Server Computer Network
The benefits of a client server computer network are substantial, but there are some limitations.
  • A server based computer network is more expensive to implement. Server computers are powerful machines with built-in redundancy and other hardware to provide data safety. Hence, they cost much more than a simple desktop computer.
  • The server network software is also much more powerful, complicated, and must be installed correctly to run all of the required tasks, and so the cost is higher for both the software and installation charges.
  • The server is a critical point of failure. If it goes down, the entire network comes to a halt. This drawback can be minimized with the installation of redundant drives in the server (so that if one fails, the others will still be working), and even a second server that can take over if the primary server fails completely. Cost then becomes the only issue.

Which Computer Network is Best For Your Business?

Peer to peer computer networks are reliant upon the computer users, so employee behavior is a major factor. Peer to peer networking could work for your business if you have the following:
  • Computer savvy employees whom you trust.
  • Low employee turnover.
  • Five or less employees.
  • Newer desktop or laptop machines with lots of memory and hard drive space.
  • A large capacity portable data storage unit for backing up files and taking them off site.
  • Time and motivation to keep the computer patches and maintenance up to date.
A client server computer network is more secure, easier to manage, and would be a better solution for your business if the following is true:
  • You want to secure your company data and provide access to certain files and folders to only a few employees.
  • Your business experiences high employee turnover.
  • You have more than 5 employees.
  • A secure, complete backup of all of your critical business data is needed.
  • A central information repository for your employees would be helpful.
  • You want to have a cohesive email solution using a single domain address (i.e., jack@yourcompany.com, megan@yourcompany.com).
Think of the cost of implementing a network as an investment in your business. As your business grows, implementing a computer network will help your employees share information and resources, and in the long run, will play a major role in the successful growth of your business.
For enterprise solutions, there are a number of network assessment services that provide complete needs analysis and can create a custom solution to meet business objectives